
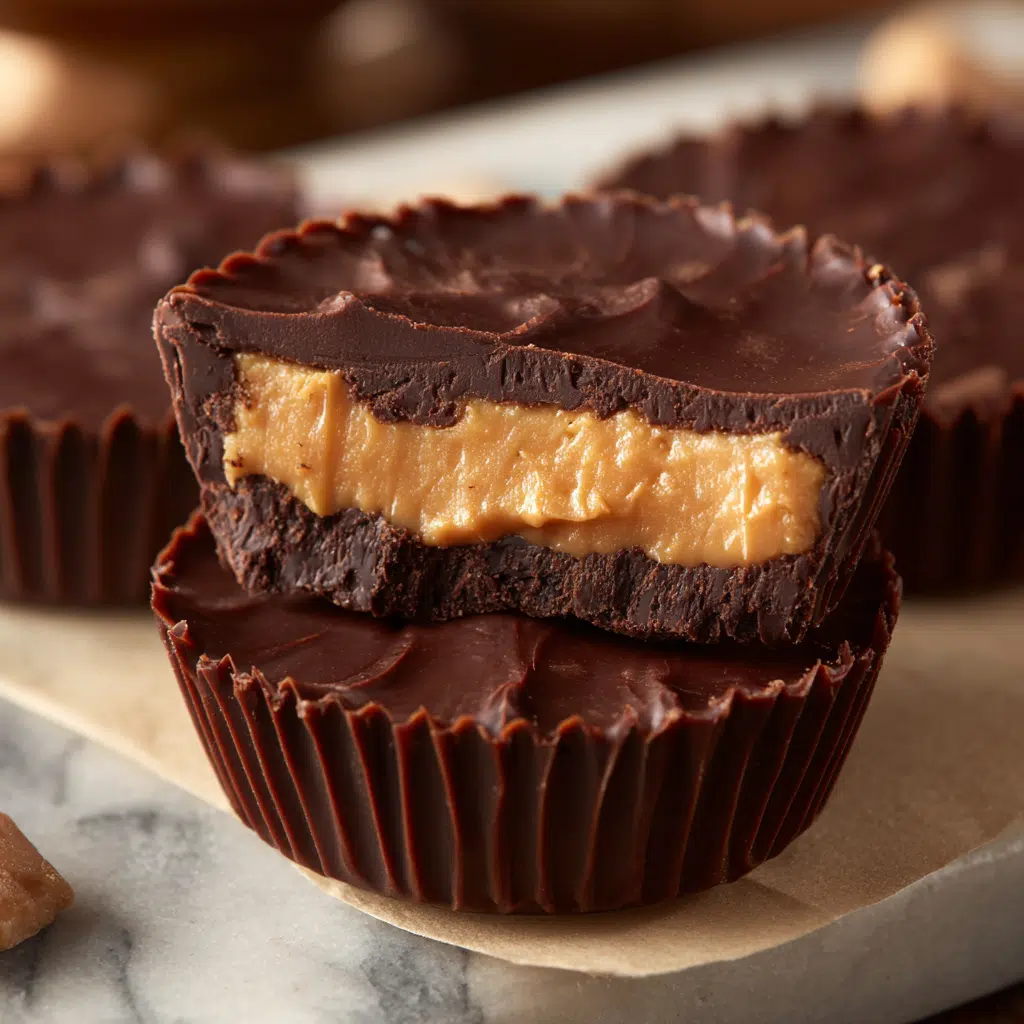
Skip the store-bought version—these Homemade Peanut Butter Cups are simple, satisfying, and incredibly delicious. With just four basic ingredients, you can recreate the nostalgic flavor of a classic candy aisle favorite in your own kitchen. Creamy peanut butter mixed with powdered sugar and butter creates a rich, sweet, and slightly salty filling, all encased in a smooth milk chocolate shell. These treats are perfect for gifting, snacking, or satisfying late-night cravings.
This recipe is straightforward and requires no baking, making it a great project for kids or beginner home cooks. Whether you make them in mini muffin liners for bite-size indulgence or standard cups for a more generous treat, they store well and are always a hit. You’ll love how quickly they come together and how they taste even better than the packaged version.
Why You’ll Love This Recipe
- Just four ingredients – Simple pantry staples with no preservatives.
- No-bake treat – Ready in under an hour without turning on the oven.
- Customizable – Easily adjust sweetness, chocolate type, or add toppings.
- Make-ahead friendly – Perfect for storing in the fridge or freezer.
- Better than store-bought – Richer flavor and smoother texture, made fresh.

Ingredients
- Creamy peanut butter
- Unsalted butter (room temperature)
- Confectioners’ sugar
- Milk chocolate chips
Variations
- Dark chocolate version: Use semi-sweet or dark chocolate chips for a deeper flavor.
- Crunchy peanut butter: Adds texture and a nutty crunch.
- Salted topping: Sprinkle sea salt on top before chocolate sets for contrast.
- Nut-free option: Swap peanut butter for almond, sunflower seed, or cashew butter.
- Layered cups: Create layers of white and milk chocolate for visual appeal.
How to Make the Recipe
Step 1: Prepare the Filling
In a bowl, mix creamy peanut butter, unsalted butter, and confectioners’ sugar until smooth and thick. Set aside.
Step 2: Melt the Chocolate
In a microwave-safe bowl, melt the milk chocolate chips in 30-second intervals, stirring between each until fully smooth. Alternatively, melt using a double boiler.
Step 3: Assemble the Cups
Line a mini or standard muffin tin with paper liners. Spoon a small amount of melted chocolate into the bottom of each liner and spread to cover the base.
Step 4: Add Peanut Butter Filling
Scoop about a teaspoon of the peanut butter mixture (more if using standard-size cups) and gently flatten it. Place on top of the chocolate base in each cup.
Step 5: Cover with More Chocolate
Spoon more melted chocolate over the peanut butter layer to fully cover. Tap the pan gently to level the tops.
Step 6: Chill
Place the tray in the refrigerator for 30–45 minutes, or until the chocolate is set.

Tips for Making the Recipe
- Use high-quality chocolate for the smoothest texture and best taste.
- Don’t overfill—leave space around the edges for the chocolate to seal in the filling.
- Use a piping bag or spoon with care for clean layers.
- Chill between layers for neater results.
- Store in a cool place to avoid melting, especially in warm climates.
How to Serve
- Serve cold or at room temperature for a softer bite.
- Great on dessert platters, cookie trays, or holiday gift boxes.
- Pair with coffee or milk for a classic combo.
- Crumble into ice cream or on top of cakes.
- Enjoy as a midday treat or sweet after-dinner bite.
Make Ahead and Storage
Storing Leftovers
Store in an airtight container in the fridge for up to 2 weeks.
Freezing
Freeze in a single layer, then transfer to a freezer bag. Keep frozen for up to 3 months. Thaw in the refrigerator before serving.
Reheating
Not necessary—these are best enjoyed chilled or at room temperature.
FAQs
1. Can I use natural peanut butter?
Yes, but stir well and be aware the texture may be a bit looser.
2. How do I keep the chocolate shiny?
Use tempered chocolate or avoid overheating it. Chill quickly but not in the freezer.
3. Can I make these vegan?
Yes—use dairy-free butter and chocolate, and make sure your sugar is vegan-friendly.
4. Do I need a muffin tin?
It helps with shape, but you can also use silicone molds or candy cups.
5. Why is my chocolate not smooth?
It may be overheated or seized. Use gentle heat and stir frequently.
6. Can I make them smaller for bite-sized treats?
Absolutely—mini muffin tins are perfect for this.
7. Can I double the recipe?
Yes, and they store well in the freezer so make a big batch!
8. Are these safe for nut allergies?
Use a nut-free butter alternative like sunflower seed butter.
9. How long do they last?
Up to 2 weeks in the fridge or 3 months in the freezer.
10. Can I add extra mix-ins?
Sure—try adding chopped nuts, pretzels, or even mini marshmallows to the filling.

Conclusion
Homemade Peanut Butter Cups are proof that simple ingredients can create something extraordinary. With their creamy, sweet peanut butter center and rich chocolate shell, they’re everything you love about the classic candy—only fresher, tastier, and made right in your kitchen. Whether you’re whipping up a quick dessert, planning a homemade gift, or just craving something sweet, these peanut butter cups are a quick win that everyone will love.
Print
Homemade Peanut Butter Cups
- Total Time: 45 minutes (including chilling)
- Yield: 12–14 mini peanut butter cups
- Diet: Gluten Free
Description
Rich, creamy, and completely irresistible—these homemade peanut butter cups are the perfect balance of sweet milk chocolate and salty-smooth peanut butter. A no-bake treat that’s quick, easy, and better than store-bought!
Ingredients
-
½ cup (129 g) creamy peanut butter
-
3 tbsp unsalted butter, room temperature
-
¼ cup (31 g) confectioners’ sugar
-
2 cups (364 g) milk chocolate chips
Instructions
-
Prep:
Line a mini muffin tin with paper liners (about 12–14 cups). -
Make peanut butter filling:
In a bowl, mix peanut butter and softened butter until smooth. Stir in confectioners’ sugar until fully incorporated. Set aside. -
Melt chocolate:
In a microwave-safe bowl, melt the chocolate chips in 30-second intervals, stirring in between, until fully melted and smooth (about 1½–2 minutes total). Alternatively, melt using a double boiler. -
Assemble cups:
Spoon about 1 teaspoon of melted chocolate into the bottom of each muffin liner. Tap the pan gently to spread. -
Add filling:
Roll about 1 teaspoon of the peanut butter mixture into small discs and press gently onto the chocolate layer. -
Top with chocolate:
Spoon another teaspoon of melted chocolate over the filling, spreading to cover completely. -
Chill:
Refrigerate for 30 minutes to 1 hour, or until set.
-
Serve or store:
Enjoy immediately, or keep refrigerated in an airtight container for up to 2 weeks.
Notes
Use natural peanut butter for a less sweet, more intense peanut flavor.
Try dark chocolate or white chocolate for a twist.
Add a pinch of sea salt on top before chilling for a gourmet finish.
- Prep Time: 15 minutes
- Cook Time: 0 minutes (no baking required)
- Category: Dessert, Candy, No-Bake
- Method: No-Bake
- Cuisine: American